How to Pay Vendors in QuickBooks Online and Desktop
If you want to keep your vendors happy, you need to make sure they’re paid on time. That’s where QuickBooks comes in. QuickBooks Online and QuickBooks Desktop offer several ways to make your vendor payment process easier.
In this blog post, you’ll learn how to pay vendors in both online and desktop versions of QuickBooks.
Whether you prefer online bill pay or traditional checks, we’ll walk you through the process. We’ll cover applying credits, scheduling payments, and making sure your vendors get their money on time.
What is QuickBooks?
QuickBooks offers small businesses, startups, and solopreneurs comprehensive bookkeeping, accounting, payment processing, and general financial management benefits with many more features to boot.
While not necessarily robust enough for enterprise-level operations, QuickBooks’ standout qualities include an intuitive interface that’s simple enough for even accounting novices to navigate and a range of third-party add-ons and integrations that cover gaps lacking on the native platform.
QuickBooks Online vs. QuickBooks Desktop
QuickBooks Online is a browser-only platform stored in the cloud, you can access your books, pay vendors, and more from a mobile device or any computer with your login credentials. Likewise, cloud-connected accessibility means multiple regionally separated users can use vendor payment functions remotely when given appropriate authorizations.
Though now a legacy product while the platform goes through a planned sunset, existing users can continue leveraging their one-time licensing purchase to use the platform installed on their computer. As a local software, QuickBooks Desktop lacks the cloud-connected capabilities of QuickBooks Online (unless installed via a hosting service). Vendor payments generally function the same in both QuickBooks Online and Desktop, though some user interface functions may vary slightly.
How Does QuickBooks Payments Work?
QuickBooks Payments lets vendors and business owners alike streamline payment processing directly in-app. While limited in some respects, users can send invoices or payment requests directly to customers and clients and get paid via PayPal, credit/debit card, ACH, Apple Pay, and even Venmo.
The lowest tier, Basic, is free but offers just five free monthly ACH payments. Beyond that, you’ll pay $0.50 per ACH payment and can elect to pay $10 per transaction to expedite ACH payments. Check payment processing is $1.50 per check.
The Premium tier is $7.50 per month and includes 40 free ACH payments, with additional payments at the same fee schedule as the Basic plan.
The top plan, Elite, at $45 per month, includes no-fee ACH payments and additional workflows for users with more robust payment processing needs.

Additional Fees
Beyond the basic monthly subscription, you’ll also pay a range of fees depending on the transaction type and payment method:
- Credit cards and digital wallets: 2.99% of the total transaction
- ACH bank payments: 1%
- Card reader: 2.5%
- Manually entered cards (keyed-in): 3.5%
Using QuickBooks Payments to Vendors
Since it is directly integrated into the platform, using QuickBooks Payments is simple.
- You’ll want to first navigate to Expenses in the sidebar, then click Bills to open the vendor payment management dashboard.
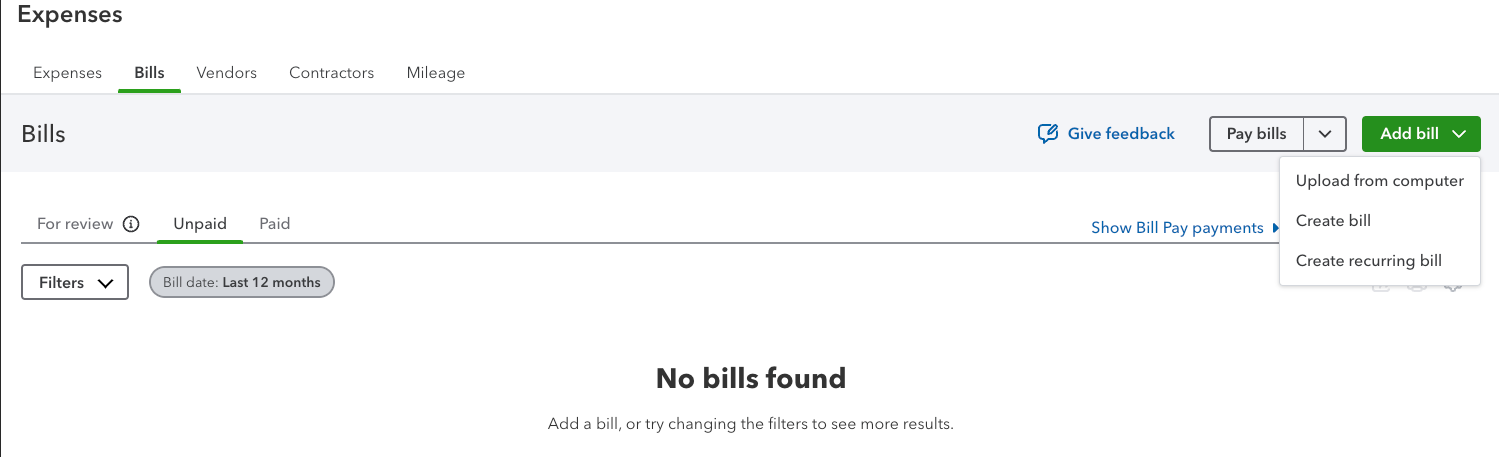
- From there, assuming you aren’t paying directly from an invoice or existing document, click Add Bill in the top rightmost corner.
- Then click Create Bill (you can also create a recurring bill from this workflow).
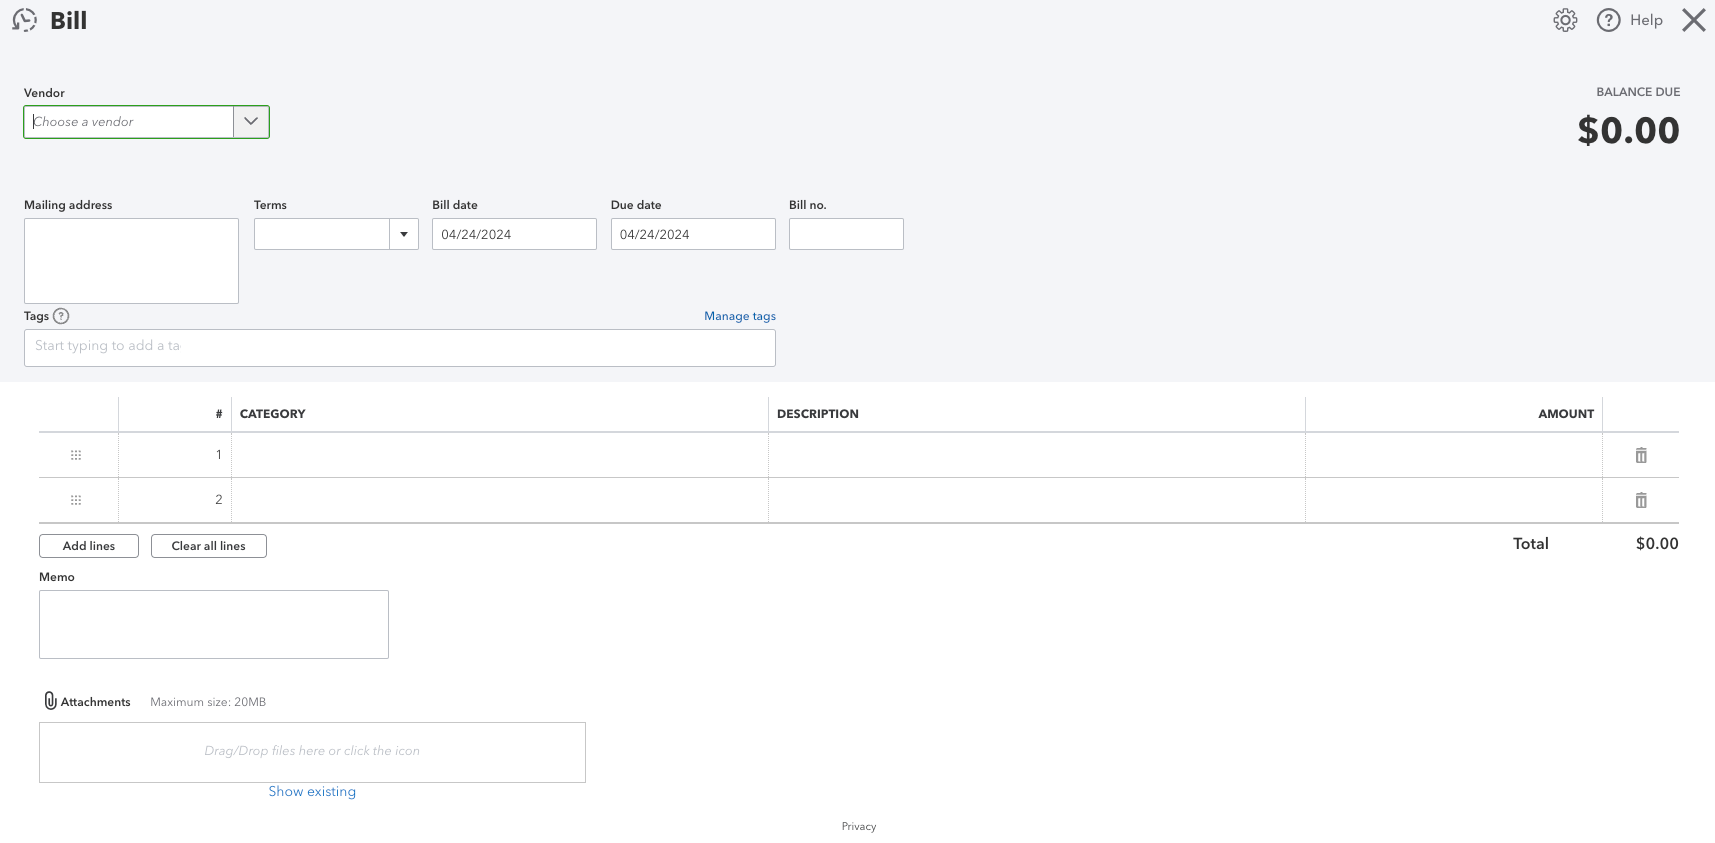
- You’ll then see a blank bill window and plug in all relevant vendor information within the entry fields.
- Once saved, you’ll return to the vendor dashboard and can schedule payment.
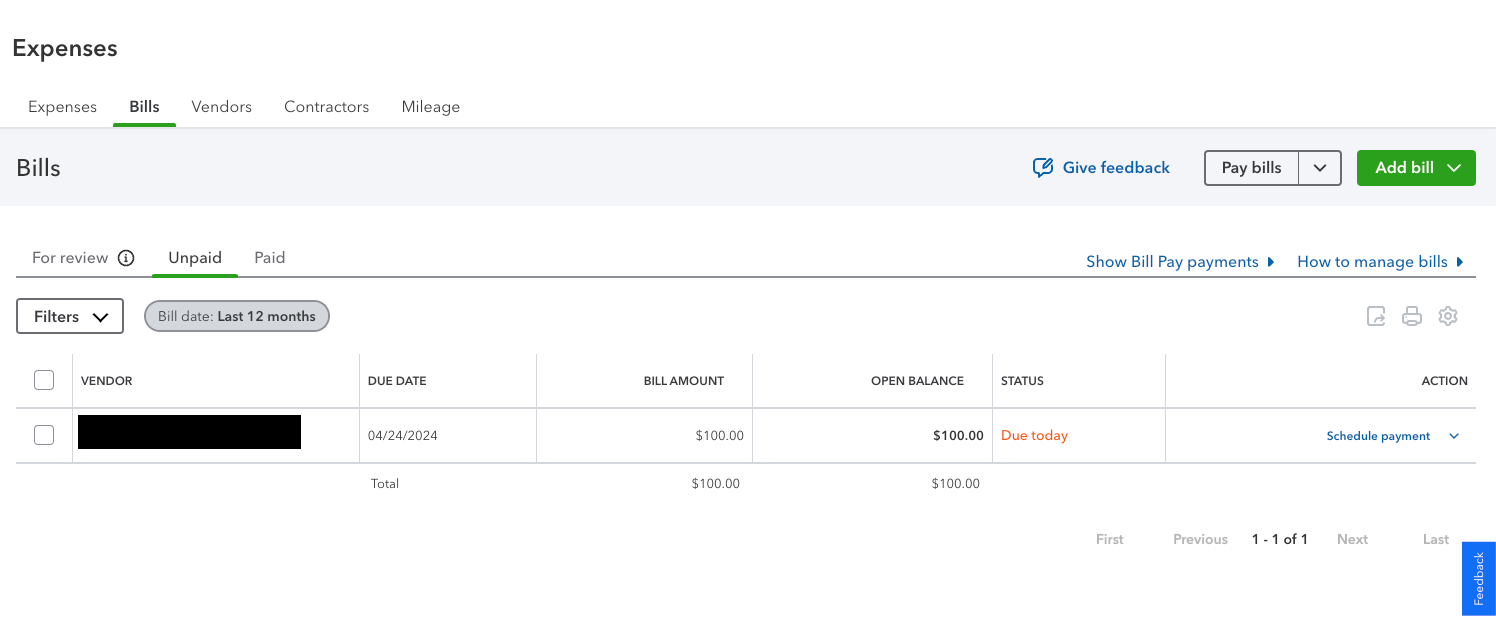
- You'll enter your payment information from the Schedule Payment window and schedule the payment.
This is also how to pay vendors via ACH when using QuickBooks Online, though you can enter any authorized and available payment method within this window.
Benefits of QuickBooks Vendor Payments
There’s something to be said for simplicity, and keeping vendor payments nested within your wider accounting and bookkeeping ecosystem goes a long way toward simplifying your financial life. Some of the key added features include:
- Automated matching - Verify that the details on the purchase orders and the associated invoices match so that the invoice can be paid
- Data centralization - A single source of truth for improved decision-making
- Payment Scheduling - Outline the timing, frequency, and amount of payments
- Visualization - Present key metrics in visual form for maximum insights
All of the above serve to streamline workflows and keep an accurate tally of the cash leaving your business – while leveraging QuickBooks’ robust security protocols.
Conclusion
QuickBooks Bill Pay and Payments are a simple, closed-loop series of vendor payment workflows to streamline and simplify your supplier or contractor payment processes. Though the ins and outs may take some getting used to, the ease of use and ability to keep tabs on your entire financial system is underrated as we increasingly complexify our business lives.
Frequently Asked Questions
Can I pay vendors directly through QuickBooks?
Yes! You can pay vendors via ACH, debit, or credit card through QuickBooks easily. You can also select additional payment options via third-party plugins or manual payment management tools within the platform.
Can I create vendor credits in QuickBooks?
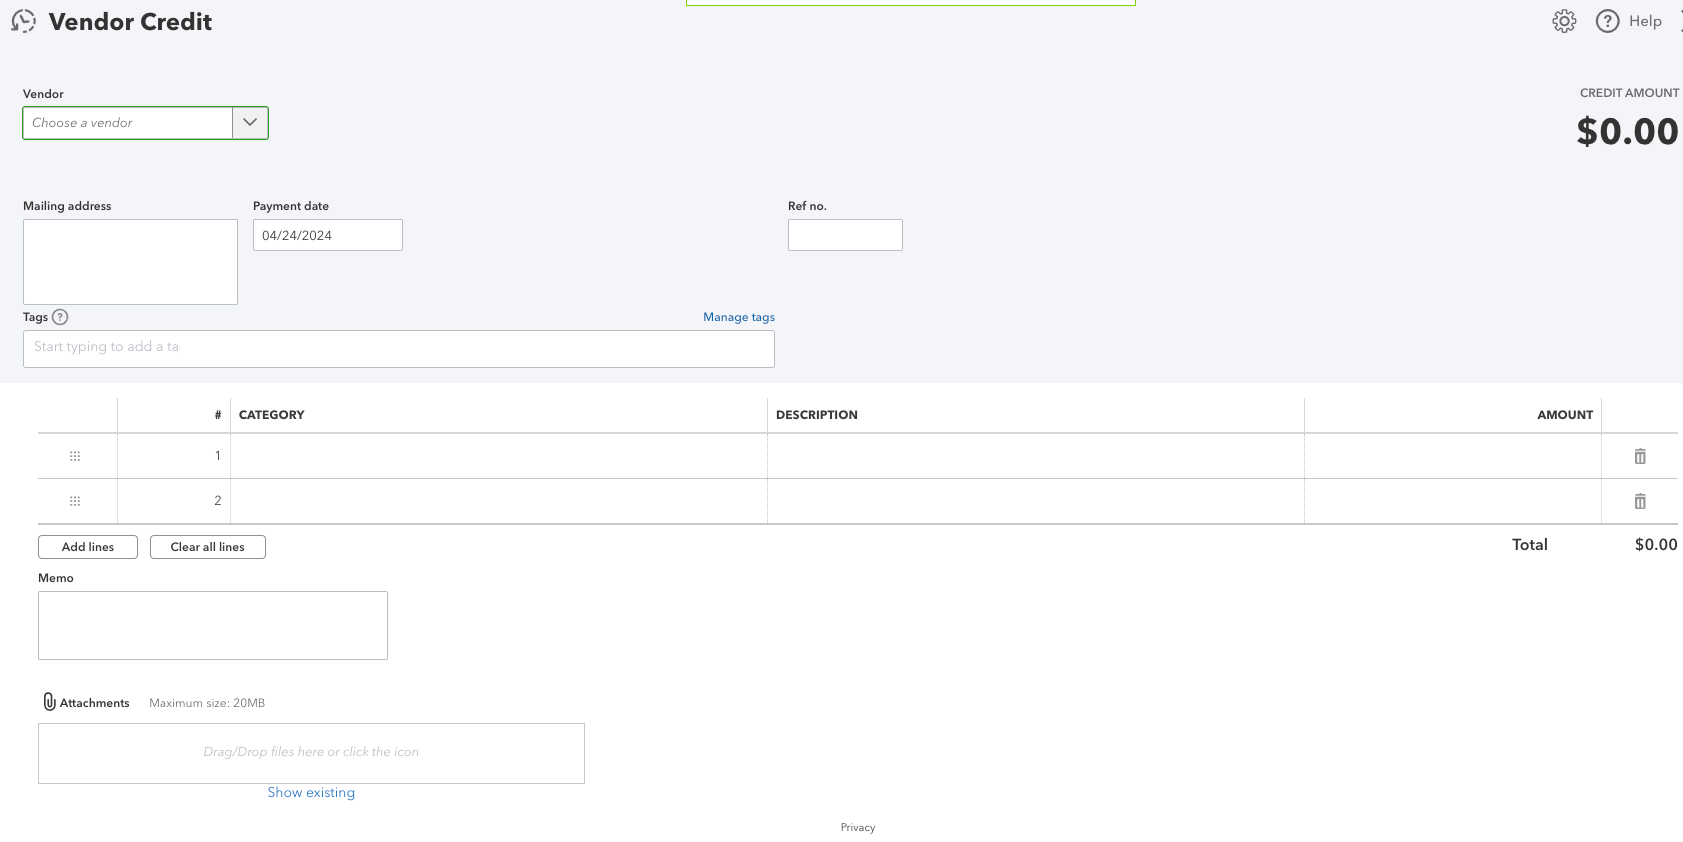
Yes! To create a vendor credit in QuickBooks Online to drop your owed amount:
- Simply click Create
- Then select Vendor Credit. You’ll see the vendor portal where you can enter all relevant data.
- Return to the Bill Payment dashboard to apply the credit to an existing bill.
- Then, go to Credits and mark the relevant vendor credit before saving and closing the bill.
Creating vendor credits in QuickBooks Desktop is much the same, though
- you’ll first navigate to Vendors
- and then Pay Bills to set the relevant vendor credit within an existing bill.
Can I edit or cancel an online payment after sending it?
Yes, though time is of the essence. Depending upon how long it’s been since sent:
- You can Delete the Payment, which removes it from your records, or
- Void a Payment, which sets the payment amount to zero.
Note that neither returns money to your account—in these instances, you’ll need to request a direct deposit reversal or work with the vendor to refund part or all of the payment.
How Can I Streamline Vendor Payments with QuickBooks?
A range of third-party plugins and integrations can improve vendor payment management in QuickBooks, such as Nanonets’ accounts payable automation tools, which uses artificial intelligence to match invoices to purchase orders, streamline approvals, and cut down on time spent (and inevitable errors) associated with manual entries.